

Your first scheduled report
Who this is for: people who want to see Liitora work end to end, with an AI assistant or by hand.
Before you start: you need:
- an AI assistant connected to Liitora (see Connect your AI assistant), or the Editor or Admin role if you want to do it by hand in the app;
- the address and an API key of a system that answers with JSON over HTTPS, for example an order system;
- a colleague who can approve workflows (the Admin role). If you are the only admin, you can approve your own version after confirming it.
In this tutorial you build a workflow called Weekly open orders report. Every Monday at 07:00 Helsinki time it fetches the open orders from your order system, builds a CSV file of them and emails it to your sales team. When there are no open orders, it sends nothing. It takes about 20 minutes.
1. Ask your AI assistant
Section titled “1. Ask your AI assistant”-
Start a new chat with your assistant.
-
If your assistant shows MCP prompts, pick new-scheduled-report. It asks you what the report contains, when it runs and who gets it. Otherwise write it in your own words, for example:
Create a Liitora workflow that every Monday at 07:00 Helsinki time fetches the open orders from our order system at https://orders.example.com (GET /api/v1/orders?status=open, API key in the X-API-Key header) and emails them as a CSV to sales@example.com. Send nothing when there are no open orders.
-
Answer the assistant’s questions.
The assistant searches the action library first and starts from the tested template scheduled-csv-email-report. The workflow it writes looks like this:
name: Weekly open orders reportdescription: Every Monday morning, fetch the open orders from the order system and email the sales team a CSV of them. Nothing is sent when there are no open orders.on: schedule: - cron: "0 7 * * 1" timezone: Europe/Helsinki manual: truesteps: - id: fetch name: Fetch the open orders from the order system uses: platform/http.request@v1 connections: { api: order-system } with: method: GET url: /api/v1/orders query: { status: open } - id: report name: Build a CSV of the open orders if: ${{ steps.fetch.outputs.json.orders.length > 0 }} uses: platform/csv.build@v1 with: rows: "${{ steps.fetch.outputs.json.orders }}" filename: open_orders.csv - id: email name: Email the report to the sales team uses: platform/email.send@v1 with: to: [sales@example.com] subject: "Open orders: ${{ steps.report.outputs.rows }}" text: The open orders are in the attached CSV. attachments: ["${{ artifacts.open_orders.csv }}"]It uses three built-in actions: http.request calls your system through the connection order-system, csv.build makes the file and email.send sends it. The workflow file format explains every key.
2. Add the API key yourself
Section titled “2. Add the API key yourself”The workflow needs your order system’s API key. The assistant never asks you to paste it in the chat. Instead it asks Liitora for the secret and shows you a link.
- Open the link the assistant shows you. It looks like
https://<your Liitora address>/s/fill/.... - Sign in if Liitora asks you to.
- Read what the value is for and where to find it.
- Paste the API key into Value.
- Select Save. The page says Saved. Go back to your chat.
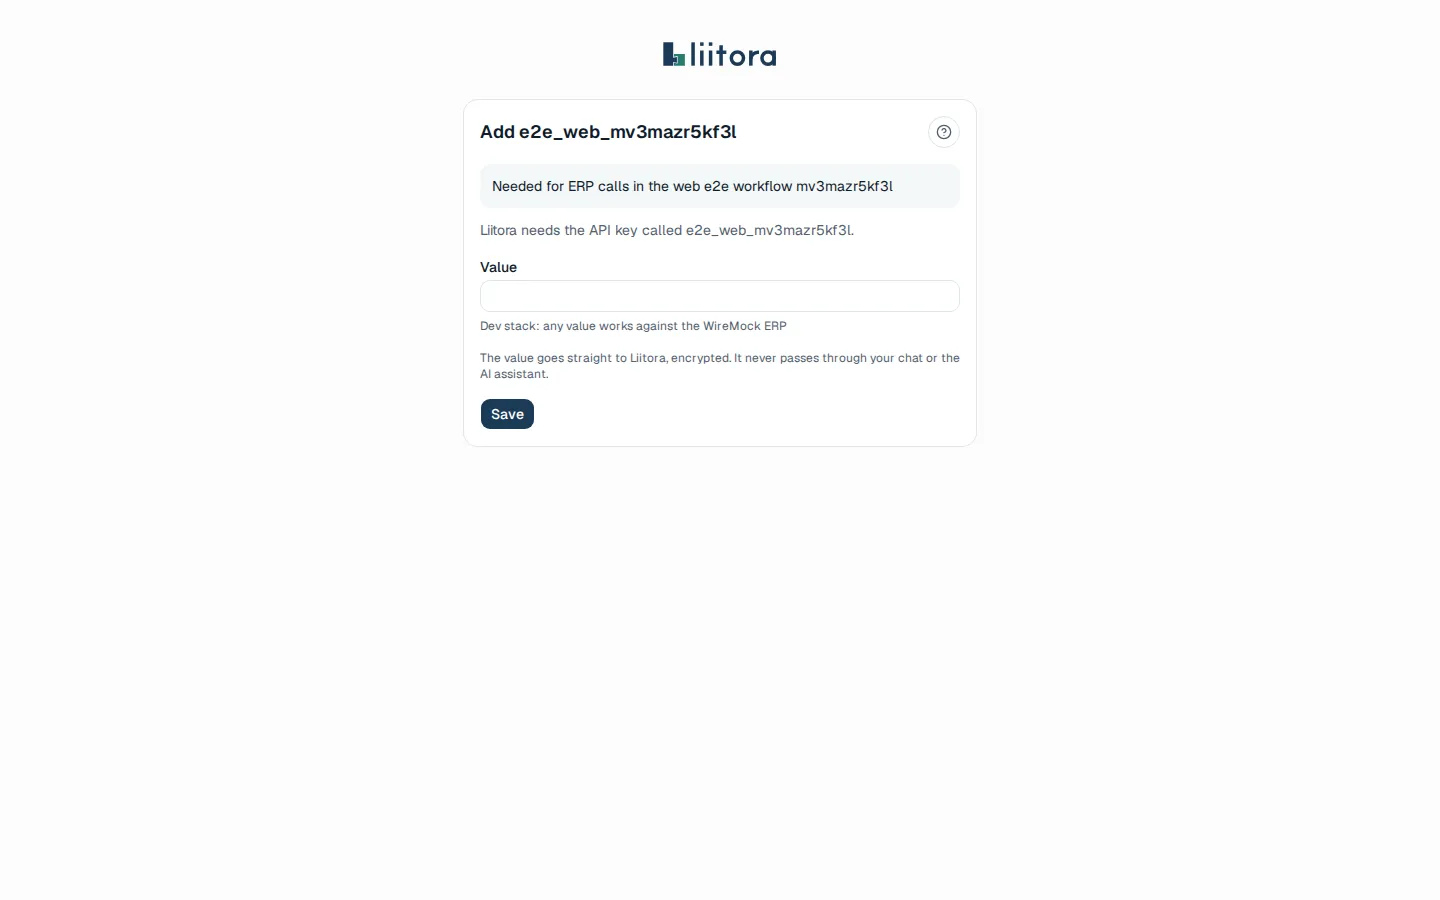
If you can’t add secrets yourself, the page lets you send the link to an admin. You can also add the value on the Secrets page, under Waiting for you. See Add a secret.
3. Create the connection
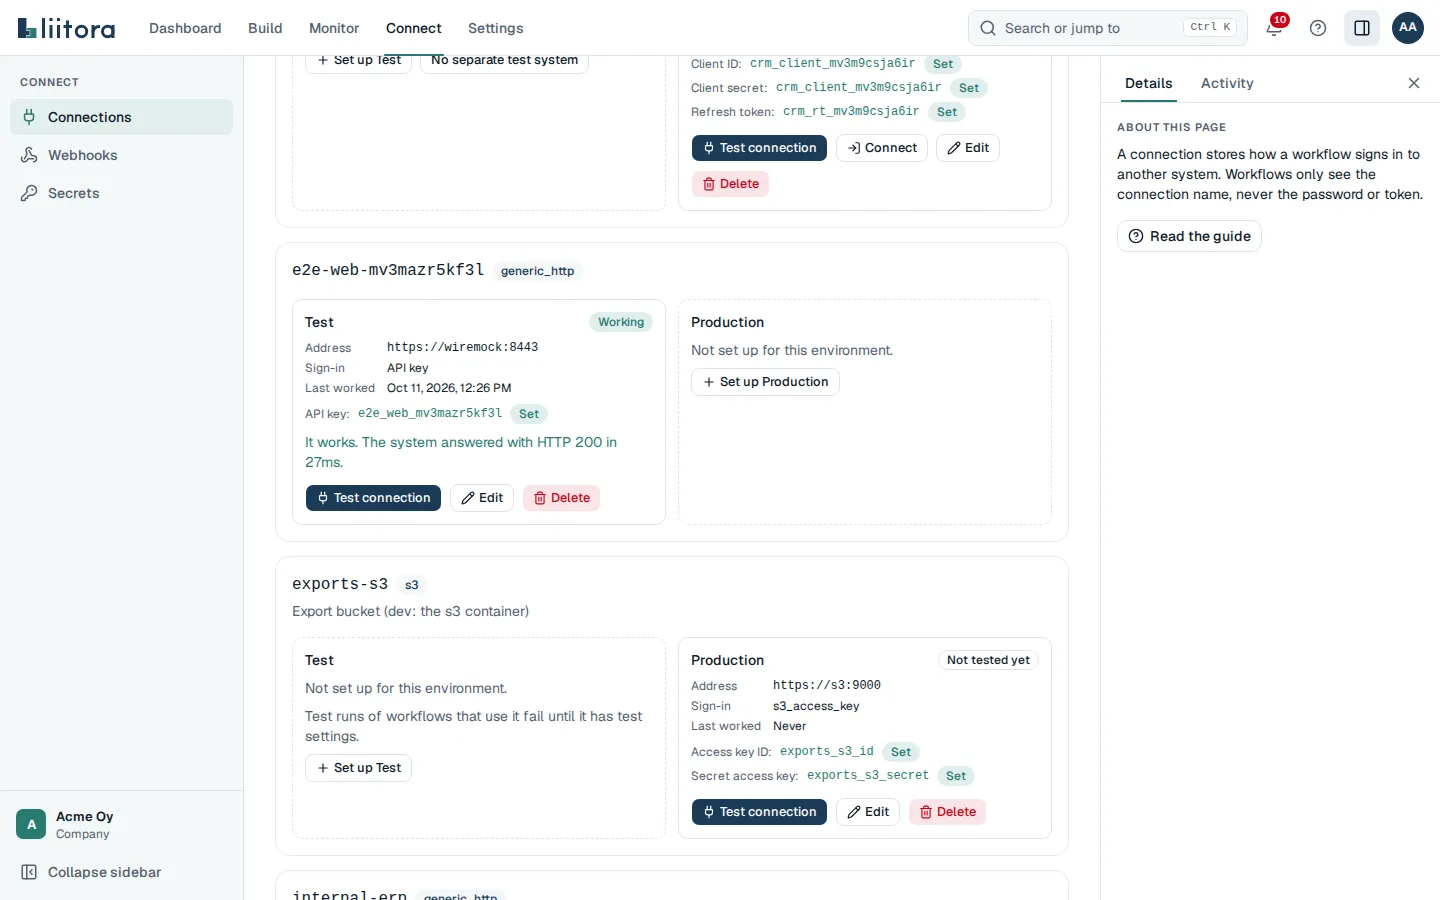
Section titled “3. Create the connection”The assistant creates the connection order-system for you with the create_connection tool: the address, the sign-in method (API key in the X-API-Key header) and the name of the secret. It never holds the key itself.
To do it by hand instead:
- Open Connections.
- Select Add a connection.
- Enter the Name
order-system, pick the Environment, and enter the Address, for examplehttps://orders.example.com. - Pick the Sign-in method API key, set Header or parameter name to
X-API-Keyand pick the secret by name. - Save, then select Test connection.
Create it for both Test and Production: a test run uses the test setup, and real runs use production. See Create a connection.
4. Review the draft and its tests
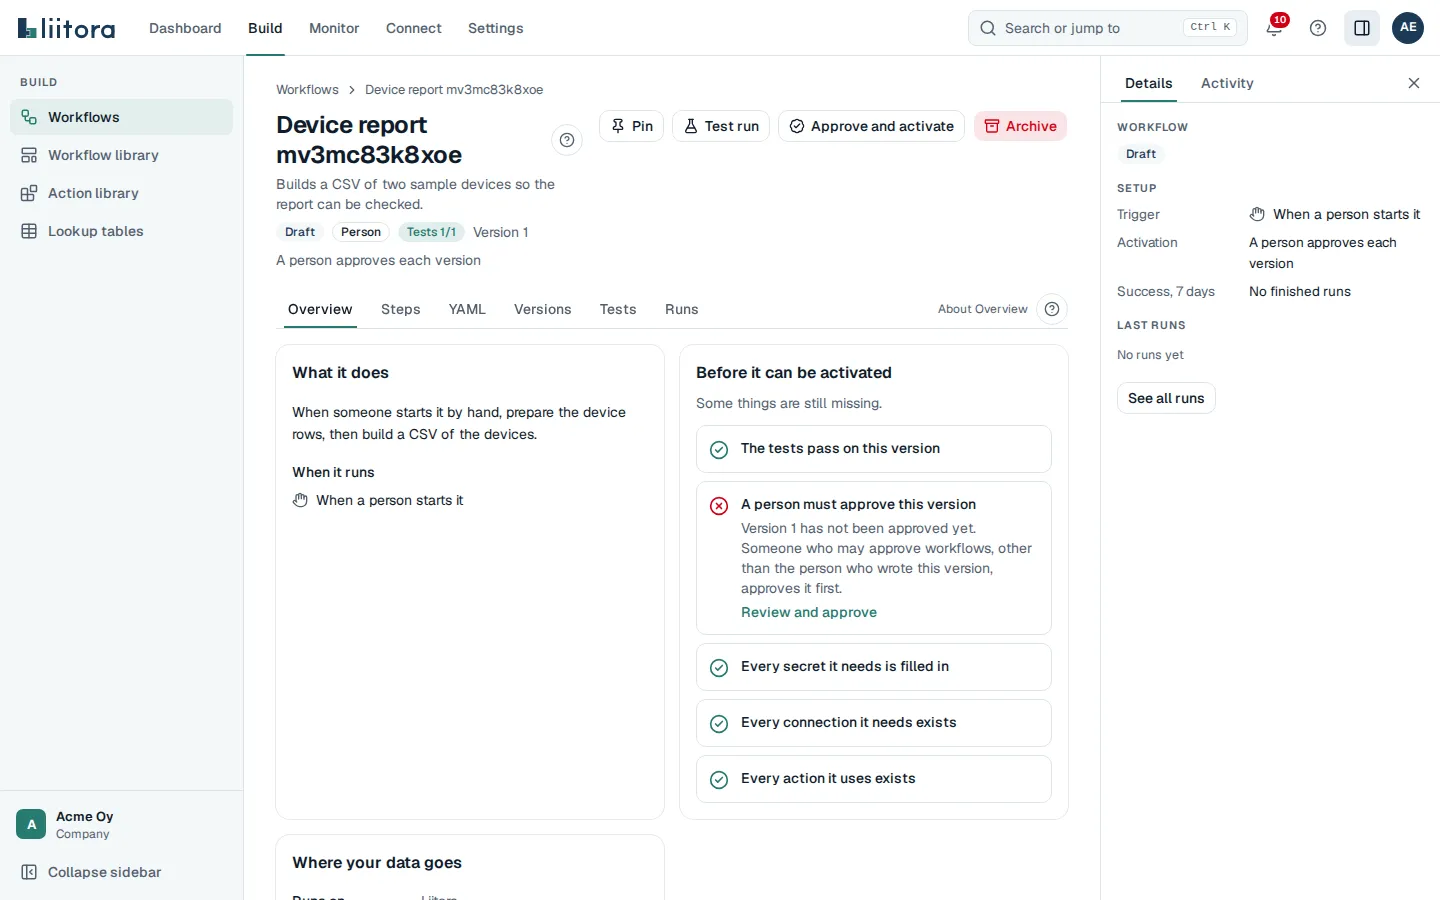
Section titled “4. Review the draft and its tests”The assistant saves the workflow as a Draft and gives you a Review workflow link. Nothing runs yet.
- Open the link, or open Workflows and select the workflow.
- On Overview, read What it does (the plain-English summary) and When it runs. Check the list Before it can be activated.
- On Steps, check the order of the steps.
- On YAML, read the file itself.
- On Tests, read what the tests check.
The template comes with three test cases. They run each time the workflow is saved, against fake answers, so your real system is never called:
- Emails the sales team a CSV of the open orders: two orders lead to one email with
open_orders.csvattached. - Fails cleanly when the order system is down: the order system answers 503, the run fails at the fetch step and nobody gets an empty report.
- Sends nothing when there are no open orders: the report and the email are skipped.
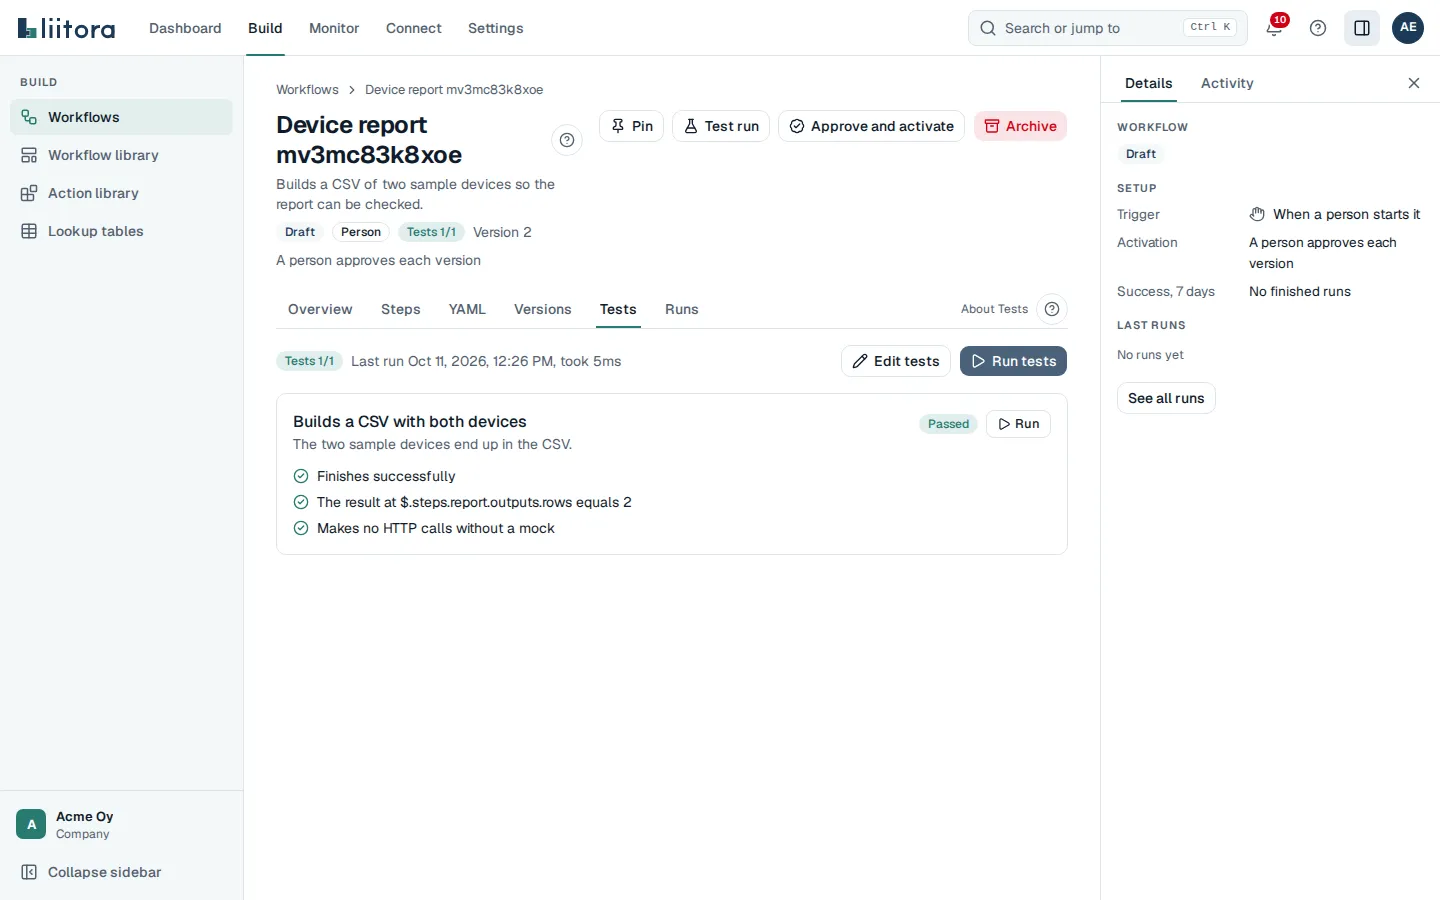
If you change what the workflow does, ask the assistant to update the tests too. See Read and write workflow tests.
5. Try it with a test run
Section titled “5. Try it with a test run”- On the workflow page, select Test run.
- Leave Input (optional) empty and select Start.
A test run uses your test connections and is marked Test. The assistant can do the same with its test_run tool and tell you what happened.
The email goes out through your company’s email sender. If you haven’t set one up, Liitora sends it from its own address. To send from your own domain, see Set up email senders.
6. Approve and activate
Section titled “6. Approve and activate”A different person than the author approves. If the assistant wrote the workflow with your API token, you count as the author, so ask your colleague.
- Your colleague opens the Approve & activate link the assistant showed, or selects Approve and activate on the workflow page.
- They read What it does, What changed and What the tests check.
- They add a Comment (optional) and select Approve this version.
- They select Activate. The page says The workflow is active.
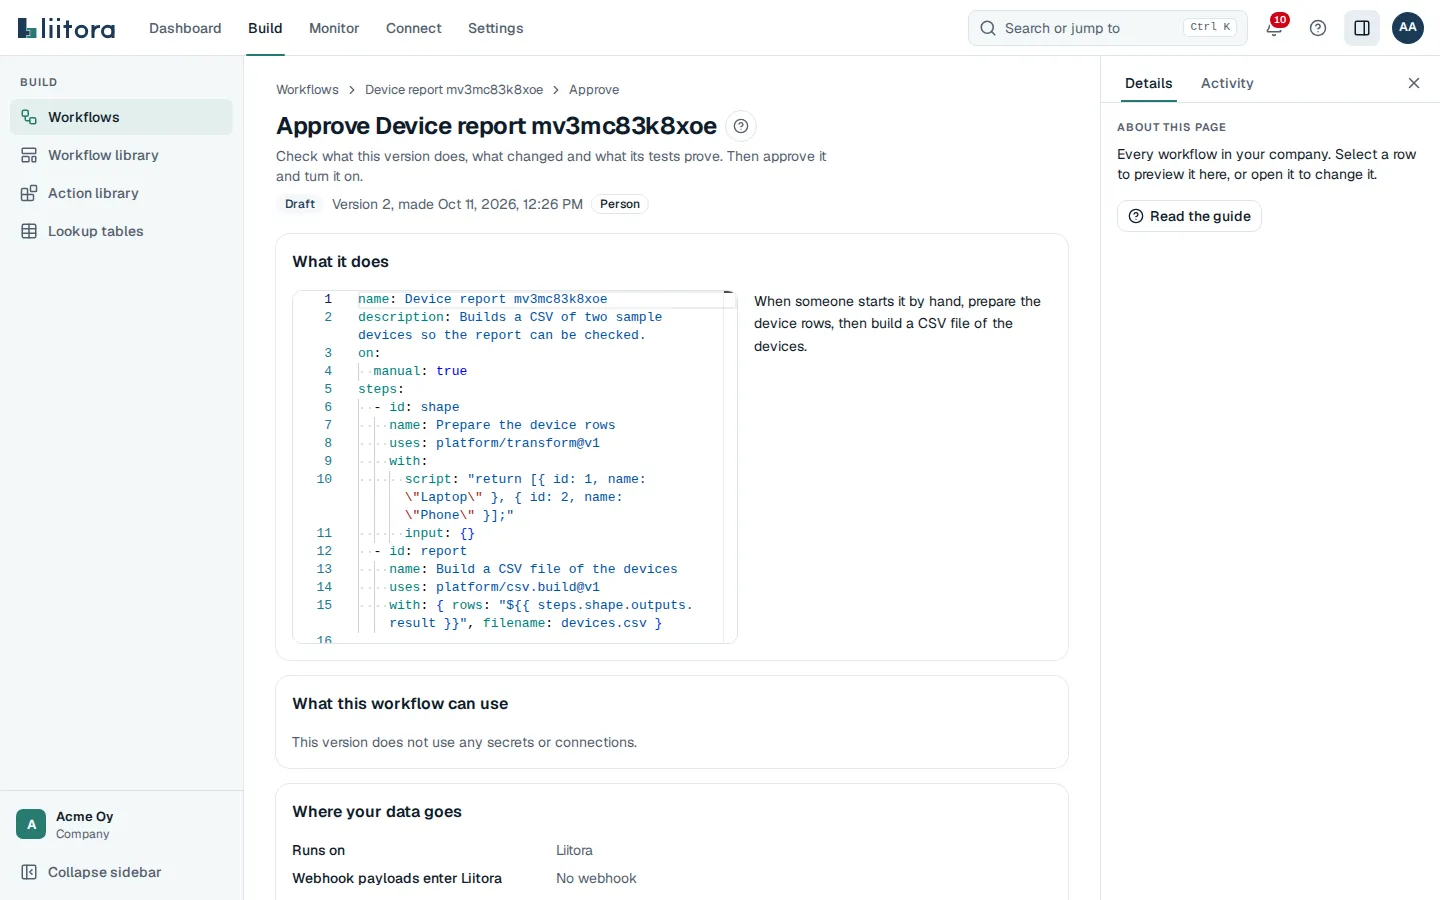
Activate stays disabled until every item in the checklist is done. See Approve a workflow.
7. Watch the run
Section titled “7. Watch the run”The workflow now runs every Monday at 07:00 Helsinki time. To see it work today, select Run now on the workflow page and Start. This is a real run with your production connections.
- Open Runs. The newest run is at the top.
- Select it to open the run.
- Open each step to see its Input, Output, HTTP calls and Log.
- Under Files, select Download next to
open_orders.csv. - Check that the sales team got the email.
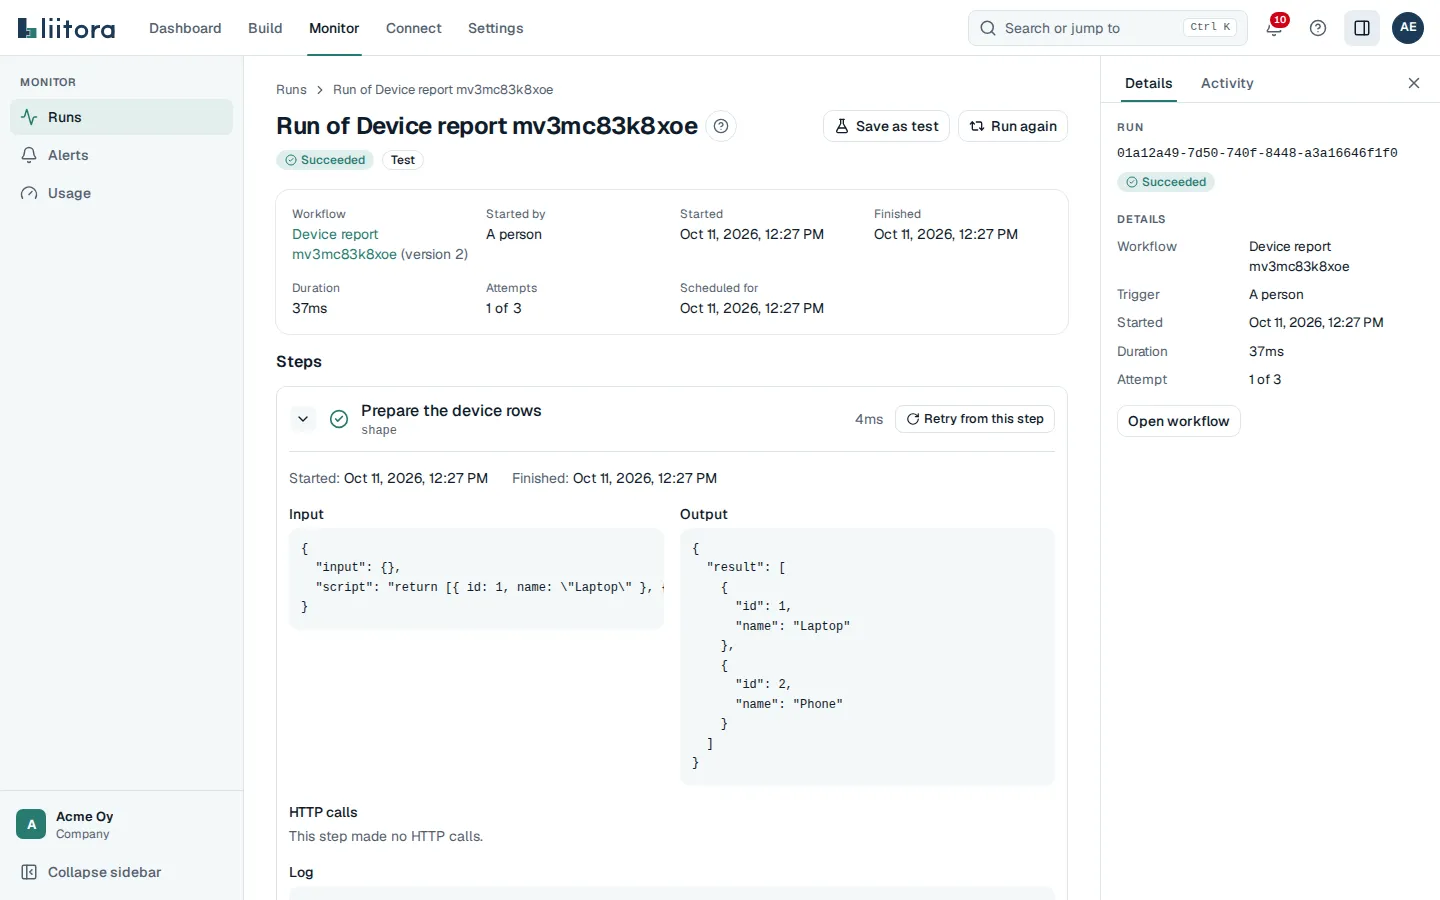
If a step fails, open it to see why, or ask the assistant “Why did the last run of the open orders report fail?” See Read run logs.